
Many modern users Flags the concept of "flashing" if it is mentioned in the context of mobile phones, so it would be useful to disassemble how to flash the phone android. Most often it is necessary in case the phone does not turn on or began to bite very much. Although some simply do not suit their firmware due to design or other similar moments.
In any case, we will consider the easiest way that even the most inexperienced users will be able to perform. This method is suitable for all models of smartphones from Samsung, HTC, Fly and other modern manufacturers.
In this case, the whole process will be described so that everyone can fulfill all its stages at home, not attracting specialists.
What we need
Besides itself mobile phone, this method provides for the availability of a program called Rom Manager.. Download it best on Google Play..
Developer this application is a team under the unusual name ClockworkMod. This team has long been enormous popular and authority among users of the most different countries.
Their creation allows you to easily change the firmware, as well as perform a huge number of systemic manipulations.
These include including:
- Backup;
- System Restore;
- Installing new firmware (what we need) and much more.
The main advantage of using the ROM Manager program to flash any phone, whether samsung, HTC, Fly, or some other, is the ability to roll back all changes.
This means that if during installation or after it will have any problems (for example, if the phone does not turn on), the new firmware simply does not like for any reason, everything can be returned back.
Among other advantages of using ROM Manager is especially important as follows:
- It is easy and everything can be done at home;
- All operations are made quite quickly;
- You don't need anything through a computer, everything happens through the phone (except that through the computer will need to throw the firmware to the phone, although there are other methods such as Bluetooth or file sharing);
- Reliability - thousands of users have already done a similar procedure.
We also need a new firmware itself. Many users today do not know where to find it. And make it easier through the phone.
In Google, you need to enter a request type "Firmware to [model of the phone]", that is, for example, "firmware on Samsung Galaxy J7. All this is done very simply.
The problem is that on the Internet there is a huge number of firmware, but a lot of them, speaking by the language of advanced users, "broken".
This means that after installation, the computer will not turn on, the user will not be able to establish some programs or other problems of the most different kinds will occur. Therefore, before downloading this or that firmware, use the following advice.
Tip: Read on the Internet that other users write about that version of the firmware you are going to download.
To date, the positive opinion of people who have already established anything is the best quality guarantee. And the manufacturer can write what he wakes up and all of this, of course, will be only good. Another advice will help you choose good firmware.
Tip: Use the Rom Manager Premium program, which will allow not easy to find firmware for your phone model, and also will show which of them most popular among other users. Also in the program window, you can see the discussions of other users regarding a particular firmware version.
In any case, before performing all the actions described below on your phone, or rather, on a memory card (this is important!), Must be located. zip Archive with a new firmware.
So, we turn to the firmware itself.
Android phone firmware stages
The ROM Manager program has already downloaded and installed on your phone.
Now you need to do the following:
- Receive root rightbut. If you do not know how to do it, the whole process will be described more specifically for you.
- Open the Rom Manager program and install ClockworkMod. It is a program that performs downloads any files.
Yes, Android has its own such program, but we need to work ClockworkMod.
To do this, do the following:
- At the top of the program window, in the section called "Recovery Mode", click the "Install CLOCKWORKMOD" (highlighted in Figure No. 1);
- After that, click on your device in the drop-down list, appearance which is shown in Figure No. 1.B;
№1. Main menu Rom Manager and phone model selection window
Attention: Before installation ClockworkMod. The phone should not be connected to the computer. And in general, it is better to turn off all its communications tools other than Wi-Fi, which will allow you to download the necessary files.
- We are waiting for the end of downloading and installing ClockworkMod.
Now you need to do backup Systems. It will be needed in case of incorrect installation of a new firmware or other problems with it.
To do this, do the following:
- In the main menu, select the Save Current ROM command (highlighted in Figure No. 2);
- Specify the name of the archive in which the current firmware will be stored, that is, a backup copy of the system in the window;
- Press the "OK" button in the same window;
- We are waiting until the program will create a backup of the system and save it in the archive with the user specified name.
№2. Creating a backup in Rom Manager
To go directly to installing a new firmware, in the Rom Manager program window, you must select the "Install ROM C SD card" item, which is highlighted in Figure No. 3. After that, you will need to choose where the firmware you have downloaded, that is, the Zip archive with it.
Number 3. Set the "Install ROM C SD card" button
After that, you will be prompted to perform some actions along with the installation of a new firmware. So you can delete all data to erase the cache, as well as backup existing system. The last we have already done earlier, so here you can select only the clause concerning cache.
Council (required to execute!): After all the above steps, connect the phone to charger. It is very important, because if the phone is discharged during the installation of a new firmware, it can lead to irreversible consequences.
After that, you have to wait. Depending on the model, this process can take up to two hours, although in most cases no more than 45 minutes is spent on it. On this process of flashing will be completed.
ROOT Right Process
This process Performed in different versions of Android. But in most cases everything comes down to establish one of special programsthat literally with the help of pressing one button get these roots rights.
The list of these programs is as follows:
- Framaroot;
- Universal Androot;
- Visionary +;
- Gingerbreak;
- z4root;
- Baidu root;
- Romaster SU;
- Towelroot;
- Root dashi;
- 360 root.
Now you can find one of them on the Internet, most likely on Google Play, install and use. You can confidently say that you can figure out how to use them.
For example, the Framaroot program window is shown in Figure No. 4. All you need to do is click on the "Install SuperSU" button.
№4. Framaroot window window
System Restore
Above we talked about the fact that if some problems arise with the new firmware, you can roll back all the changes and return to old version. This procedure is also done in the ROM Manager.
In the main menu of the program, click the "Backup copies" button (highlighted in Figure No. 5).
After that, a regular dialog for selecting the location of the system image will appear. After selecting the previously created image, you can choose one of three options.
Accordingly, we will need to choose the item called "Restore".
№5. Main menu of the ROM Manager program
After a few more tens of minutes, the system can return to the state in which it was before installing a new firmware. As we see, absolutely nothing complicated in this procedure.
However, in the whole firmware with the help of the ROM Manager program, there is also nothing complicated - almost everything is done in one or two clicks.
In the video below, you can clearly see how the installation process of another firmware is occurring using the ROM Manager program. True, this is video on english languageBut the meaning of what is happening is easy.
Video
Articles and Lifehaki.
Many probably wondered how to reflash the Samsung phone without contacting the service center. It is quite possible to do this at home - for example, using a special program.
Clearing the phone from these files, you should reset all settings and restart it. Making sure everything is done correctly, you can begin preparation for flashing.
Preparation for the firmware
- To start, the user will need drivers for USB and high-quality firmware for its Samsung phone model. To find the desired firmware Can be on special sites or forums.
- Downloaded it, you can go to download special Software. A pretty good program is Multiloader. Before downloading this, you need to make sure that its version is the last.
- Other helpful advice - It is possible to remove all programs from PC, one way or another associated with Samsung, and even better - to establish a new operating system.
Step-by-step instruction
- After installing the Multiloader program, it should be launched and select "BRCM2133". Next, you should put ticks in the following paragraphs: "BOOT"? Catalog "Bootfiles", "Factory FS", "RSRC1", "Full Download", "Amss"? file "apps_compresset.bin".
- After that, the user switches to the "download" mode by pressing the lock, volume keys, and the on-shut-off button for 3-5 seconds.
- The "DOWNLOAD" appeared inscription indicates that the operation was successful. Then the owner of the mobile phone connects it to the computer using a USB cable.
- After the PC detects the device, "COM15 READY" appears at the bottom of the program, indicating the model. The user clicks the "Download" button and waits for 2-3 minutes.
- After the operation is completed, it disables the USB cable and restarts the phone - better several times.
- If a mobile device Starts in English, it is necessary to produce "pre-configuration" by typing a combination "* # 6984125 * #"? "Pre-Configuration" and entering the password "* # 73561 * #".
- After that, you need to choose a country of residence and wait for reboot. Once the device is ready again, drive the configuration "* 2767 * 3855 #", which will help completely reset the settings. The flashing is completed.
In the article, we will look at how to establish the official and custom firmware on sAMSUNG phones.
Important! The administration of the resource and the author of the article are not responsible for the telephone corruption. For any manipulation with changing the firmware, only the owner of the device is responsible. Do not flash the phone if you do not thoroughly disassemble during the installation process.
Instructions for firmware through the Smart Switch program
This method requires a minimum of effort. Therefore, it is great for novice users.
Samsung has branded utility Smart Switch, to update the firmware. The utility checks the presence of a new firmware, automatically downloads and sets the image into the phone.
Important! Notification of the availability of a new firmware will not appear if: the firmware has not yet emerged, the current OS is modified or the device is released for another market.
Instruction:
- Download a direct link program Smart Switch.
- Install the PC utility, and better on a laptop with autonomous food.
- Open Smart Switch. Connect the phone with the computer, which has access to the Internet.
- If you have a firmware for your phone, a notification will appear with a proposal to install new firmware.
- To install the firmware, click on the "Update" button.
- The program will load the image to the computer. Then the installation will start directly into the smartphone.
- Follow the instructions of the program.
- After upgrade, it is desirable to reset the settings to the factory state. Personal information will erase, so take care of backup.
Important! During the installation process, do not disconnect the phone. Do not rush to disconnect the cable after restarting the device.
Instructions for firmware through the ODIN program
ODIN program standard remedy To install standard firmware on Samsung phones. The utility supports devices only on Android.
Instructions universal and suitable for all sAMSUNG models. It is necessary to choose the firmware corresponding to the phone model. Installing an inappropriate firmware for another phone or other model, will lead to your phone to brick. Also do not flash the image of another region.
Before the firmware, turn off in the settings item " Remote control", The old name is" locking activation ", otherwise the firmware will fail. To turn off, open the settings, then the lock and protection screen. Next, item "Find Phone". If necessary, enter the data accounts To access the setup. In the next window, disconnect the aforementioned setting.
Instruction:
- Specify the exact name of the model. To do this, disconnect the power, hold down simultaneously or the button is "increasing the volume", "home" and "incl." More combinations for various models read. After the image appears, release the buttons and press the "Volume" button once.
- Rewrite the name of your phone, for example SM-G935F or SM-G950F. For this name, look for firmware.
- Download and install drivers. Or take advantage sMART program Switch. The utility will automatically determine the device, after which the driver will deliver.
- After installing the drivers, it is recommended to restart the computer. In the same way, to connect the phone to make sure to correctly define the smartphone with a computer.
- Install the ODIN program. For models issued after 2012, it is required to use the current version of the program - 3.13.1. For models released until 2012 - version 1.86.
- Download official firmware Under your model and version of the bootloader - 1, 2 or 3. Find out the version of the bootloader will help the program on the Android tab. See the digit, the fifth symbol from the end, for example, J600FPUU 1 Are3. IN this case Loader 1, so any firmware is suitable. Be numb 2, then suitable firmware With loader 2, 3 and higher. Do not install the firmware with a smaller loader.
- Unpack the archive with firmware to the root local disk. The folder name reduce to one arbitrary digit - 1 or 5. This will eliminate the problems in the firmware process.
- Run the ODIN program.
- Translate the phone to ODIN mode. The combination of buttons is described in the first paragraph of this instruction.
- Connect your smartphone to the computer. If the connection is correct, the port number appears in the program window, in the ID field: COM. The port number may differ.
- In the program window, go to the Options tab. Make sure the checkboxes are marked only at the points. AUTO Reboot and F. Reset Time.. If the checkboxes are not installed, check the specified items manually.

Firmware Parameters: The Options tab of the checkboxes should only be on Auto Reboot and F. Reset Time.
- To the right to consistently press the BL, AP, CP and CSC buttons to specify the corresponding files.

Specify Firmware Files: Load the file starting from the same first letters as the button you click.

Specify that flashing: each file starts with letters corresponding to the letters on the download button.

All sections of the firmware are selected (files correspond to the names of the buttons) - Press START
- If in the last field, specify the CSC file ..., then during the installation process all sections will be formatted. If you specify the HOME_CSC file ...., then the internal memory section will not be touched.
- To start the firmware, click on the "Start" button. Installation will begin without warning, so it is necessary to check the parameters displayed earlier.
- At the top of the program, the field with progress will be gradually filled. At the end, a green rectangle will appear with the inscription "PASS!", Which indicates a successful firmware.
- Smartphone will automatically reboot. Wait until the download is completed, then remove the cable.
Instructions for installing firmware via TWRP
If TWRP Recovery is configured on the phone, then follow the instructions below.
Before installing, additionally specify the author's assembly / fashion author, or users that installed modification, additional requirements for installation.
Algorithm of actions:
- Download and place the image of the mode on the memory card / internal section.
- Load TWRP.
- Open the backup section to save the current firmware.
- Next, clean all sections, except for the selection with the firmware and the backup.
- Click on the "Set" section where you select the firmware archive. Confirm the installation, and wait for the end of the process.
- After installation, optionally put Boot, Modem ,, Root, etc.
Recovery Custom Recovery Installation Instructions
After tWRP installationsmay need firmware for additional files for operation Recovery. Therefore, before the firmware, specify additional steps for your phone model.
Algorithm actions.
At the request of some readers, still decided to write an article by sAMSUNG firmware I9000 Galaxy S (hereinafter just SGS). The reasons:
- Yesterday's flagship and today looks quite an attractive purchase, especially against the background of a constantly decreasing cost of the gadget. Powerful iron, a great screen, a good assembly, an attractive appearance (agree in advance, on an amateur, but it suits me against the background of all other advantages, so I will ask you in advance without discussing appearance in the comments, the article is not about it). As we see, Samsung, also does not remove this apparatus, released several of its modifications and continues the development of the SGS line.
- The manufacturer, as always in no hurry with the official updates of firmware through the standard KIES channel, however, on thematic sites you can always find the latest versions of factory firmware that came there from insiders. In addition, the delays of official updates are associated with regional aspects. In fact, no one can forbid you to use any new firmware for another region, Russian and ukrainian language, by experience, is present everywhere, the difference with the "localized" version you will not notice.
- I can say that SGS is one of the most interesting phones for Gicks, because It has a very powerful community on the XDA-DEVELOPERS website and on other sites on the Internet, which is constantly developing improvements, corrections, software, khaki, the themes of visual design and, of course, directly firmware (hereinafter ROM) for this unit. To date, you can count about a hundred firmware in android versions 2.1-2.3 for every taste. More details about the developments for SGS on the XDA forum here: http://forum.xda-developers.com/forumdisplay.php?f\u003d656 and on the Internet. The subject of custom software is particularly relevant against the background of problems with factory firmware (memory management, slow file system, music playing artifacts, etc.). In addition to correcting factory errors, custom ROMs often offer additional functionality and weight of improvements.
In principle, on the Internet, the SGS firmware instructions are found quite often, but mostly they are all in English, which creates well-known difficulties for users from the former CIS. I hope that this instruction will actually help those who know English weakly.
In this article, we will look at the basic principal moments that need to be understood when you flash the phone. I will not be attached to some particular ROM, because They all have a different sequence of installation, usually described in the XDA forum theme cap, there you will find links to the necessary files. If you understand the theory, you can flash any firmware and install any update.
Preparation of the phone to the firmware.
The first thing to check is the presence of a three-button loading mode in your phone. If you are just preparing to buy, it is best to do it right in the store. On the disabled apparatus, clamp the button down the button down, the house (central button) and inclusion. Keep until the phone turns on. You should see this:

If you saw, everything is OK, if not, it means the download mode is locked at the factory (it is also found). If you are the owner of SGS and it does not work, do not despair, the three-button mode can somehow unlock how to do it - look at the XDA forum in the appropriate topic (it was not particularly afraid - I was lucky and everything works for me). If you have not yet made a purchase, it is better to search another instance. In the absence of a three-button mode, you can receive updates only through KIES, which is absolutely unacceptable for Gick! To exit the download mode, just remove the battery, nothing terrible will happen.
Download the ODIN MultidownLoader multi-loader program to your computer with Windows. This program It has a lot of versions, I use Odin 1.3 and she never let me down. The program consists of one file, starts from the folder and does not require installation on the PC. Here's what it looks like when starting:

Since the program is intended for use in service centers, 1 time you can flash up to 8 phones. You see at the top of eight slots with phone connection indicators to virtual COM ports (That is why MultidownLoader). You will most likely not need it, so the main thing is the first slot that will display all the steps of connecting and downloading the firmware into the phone, then you follow it when working.
Wailed to the program? Now close it! The next step, you need to set the PC connection to the phone in the download mode. Usually, for this in Windows 7, it is enough to simply connect SGS with the download mode to the PC. Important note: Use for this connection USB port on motherboard. Perhaps everything will work through the front panel and all sorts of splitters / hubs, but I do not recommend. From experience there may be problems. Perform the first connection without running ODIN. The system will see the equipment and install drivers. If something happens not, (especially for XP) Install the KIES package and the device drivers will be loaded to the computer. After installing the drivers, check if the ODIN program sees your phone. Turn off the kies !!! Run Odin, enter SGS to the download state, connect to PC. With a good connection, you will see a yellow indicator in the first slot. Congratulations, everything is ready for pouring on your SGS!
Phone firmware. Options of the ODIN program.
What can be done using ODIN bootloader? You can pour any ROM, factory or custom, with full turning file System Or without it, make the phone root, flash the new kernel in existing firmware. Often, the firmware procedure through ODIN is enabled as one of the steps of a more complex phone update. Their attention! Next, when working with ODIN, always adhere to this sequence:
- Turn off the kies if it is running.
- Run ODIN and configure it for firmware (we consider options and options below).
- Run download mode on SGS.
- Connect SGS to the PC and make sure the device is initialized by the ODIN loader by the indicator in the first slot.
- Last check of parameters, countdown, start!
The main files for the SGS firmware are supplied as TAR or MD5 archives. Actually, you need to specify them in the appropriate fields of the Files section (DOWNLOAD).
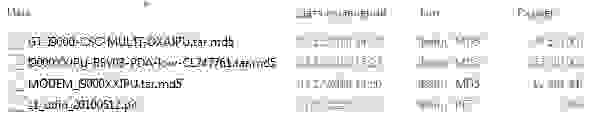
Consider for a start the simplest example - the fill of the factory firmware. Often, this procedure is necessary, among other things before the firmware of the custom ROM, to prepare the file system. Usually the firmware comes in the form of three files, the purpose of which is displayed in the title - PDA (or Code - the main firmware file), Phone (or Modem - the telephone part of the firmware responsible for working with the network) and CSC - File regional settings. Also during the firmware of the stock ROM you need to have Pit file. What it is, I will not tell you exactly :-) But it needs! Apparently it stores the service information required by the loader for the ROM firmware to the phone. At the moment there are two such files for SGS: s1_ODIN_20100803.PIT. and s1_odin_20100512.pit. These files usually go to the load to ODIN or shipped with ROM files. In the description of the firmware, it is always indicated which PIT file must be applied in a particular case. Here is an example of supplying factory firmware:
Further, as you see, everything is simple, we substitute these files to the corresponding multizrol loader fields. That's what you should get after setting ODIN and connect the phone in download mode, i.e. Immediately before pressing the Start button:

click on the picture to enlarge ...
After that, you can press the START button and the phone firmware will begin. All stages will be displayed in the Message window. After a successful end of the firmware, the indicator in the slot above will glow green and display the inscription PASS. If an error happens - red.
At this stage, let's immediately discuss the OPTION unit, namely the first two checkboxes (which means the third I will definitely not say, it is on all the time). First Re-Partition. - allows you to carry out the file system from scratch, i.e. Fully erased the phone's memory and re-marking sections according to data in the PIT file. Usually when firmware factory ROM, this checkbox is noted to avoid file system errors in the future. You will still lose all user data with the full firmware in question above, so it should be marked. Next Point AUTO Reboot - When the firmware is completed, the phone will automatically reboot. Again, when firmware factory ROM, it should be marked.
In addition to the fill, the full ROM, with ODIN, you can pour modified kernels that serve for getting Root, replacement of standard recovery (samsung 2e and 3e) on ClockworkMod Recovery. or SpeedModkernel Recovery. What is recovery and what are his functions, we will talk later. Now you should understand that with ODIN, you can also pour not three but only one update file in TAR format, which is substituted in the Multizloader PDA field. With this type of firmware, you do not need a PIT file and you do not use it. Also, depending on the sequence described in the Installation Instructions for a specific ROM, you can / should shoot Re-Partition and Auto Reboot Checkboxes. What is it done for? Usually before installing any custom firmware, you need to flash first factory. When you continue, we flash only the update, the separation of sections is naturally not needed, because It is necessary to preserve their integrity. AUTO Reboot may not need you when after updating via ODIN you need to not overload the system and immediately get into the recovery mode to execute the following installation instructions. In this case, you simply take out the battery at the end of the firmware, insert it back and load the recovery mode.
Firmware and updating the phone via Recovery mode.
Here we came to the description of the recovery regime. What it is? This is the service menu of the phone caused by the path viewed by calling the download mode, but the volume button is pressed up. So, on the disabled device, clamp the volume button up, the house, turning on, keep before activating the phone screen, release. For a short time, the screensaver will be displayed, after, you must see the text menu, usually on a black background, green, red or yellow letters (it all depends on the current type of recovery). Move the menu is happening using the volume keys (up and down), select a specific item - the power button, return to the previous menu - usually the last text submenu.
With the help of the recovery, you can flash and update the phone files in zip.. At the same time, you do not need a PC. The main thing is to throw the update files in advance to the internal card of the device.
The simplest recovery is the native Samsung versions of 2e and 3e, these types of recovery go with the factory ROM. There is a minimum of paragraphs, one of them "Apply Update.zip" i.e. The update file must lie at the root of the internal memory card (not SD) and refer to the Update.zip. The update file must be signed and is intended for firmware through this type of recovery. This version of the firmware is mainly used to get root rights on the phone with the factory ROM and is used very rarely (perhaps alternative to the firmware of the kernel with root via ODIN).
A more advanced type of recovery comes with custom firmware - this is ClockworkMod Recovery (on the forums it is called CWM). There are more items and extended functionality. Using CWM, you can install any firmware or update file in ZIP format, which may be called as you like and inner map. Memory anywhere. Choose the "Install Zip From SDCard" item Next "Choose Zip From Sdcard", in the premitial file manager that appears, find the update file, use it.

In addition to updating functions, depending on the version and modification of CWM, the following steps are possible using the Menu and Rekkovery Submenu: full cleaning Phone, Cleaning Kesha, backup and data recovery, battery log cleaning, managing system and internal user memory partitions, SD card breakdown cards and preparation for Apps2SD, Creating a SD section on SD, Apply Lagfix and File System Conversion in EXT, Enable additional features, for example, north the backlight of the keys and much more.

One of the most common CWM modifications for SGS is SPEEDMODKERNEL Recovery (SMK), which offers this advanced functionality compared to the standard CWM here more items specific to SGS.
An example is the easiest way to install custom ROM for SGS:
Many Custom ROM for SGS require SMK on the phone to carry out the installation procedure. It can be done right on the factory firmware, do not need to get root before. - it's a delusion. The easiest way to obtain SMK for the subsequent update is already through this type of recovery - the TAR file firmware with the SpeedModkernel kernel using ODIN (substitute the file in the PDA field) with the Dippectition and Auto Reboot checkboxes. After the core firmware, you take out the battery from the phone, insert it, call the recovery mode and install any update, such as Custom ROM ( zip fileNaturally need to be in your phone).
Some custom ROMs, such as Cyanogenmod, require more complex procedure Installations that contain several firmware stages via ODIN and SMK. Clearly follow the instructions from the developer and everything will turn out! Not you first, not you last! If you consider yourself a real leaf, then they are simply obliged to master these uncomplicated procedures.
ATTENTION!!! The author is not responsible for the consequences of your actions with the phone, after reading this article. I am not guilty if you turn your SGS in a brick! Official guarantee The phone disappears after independent firmware. However, if something happens, with the help of knowledge gained here, you can always flash the original firmware into your phone before going to the SC. If the phone is completely died, no one can determine which firmware in it :-) Make the face with a shovel and carries in the SC with the words: it was breaking ... in any case, I repeat: only you are responsible for all your actions and their consequences! In fact, not everything is so scary and any incidents with tragic finals happen very rarely.
Successful firmware!
Today we will talk about how to flash android Samsung different versions and which programs will be required for this.
Firmware (reinstalling the system) sAMSUNG smartphones Almost no different from flashing devices of other manufacturers. The only difference is that you need to use suitable tools.
SAMSUNG GALAXY S7, S6 and SAMSUNG A Firmware
To reinstall Android on SAMSUNG Data Models, you will need:
- driver for USB. "Samsung. USB Driver."(Download);
- program-Firmware - Odin (download);
- firmware itself (its versions under different models devices can be found on the company's official website).
Now let's go directly to how to flash android samsung new models. When everything is loaded, it will be necessary to perform them unpacking. First of all, you will need to install the driver. He needs a computer to manage to determine the phone. When this is done, you will need to go to the folder in which the ODIN is unpacked and run an executable file with administrator rights.
A program window will open in which the right will be four points with the ability to select files. Need to click on each button and choose required file. They should be positioned in the following order:
- for BL - bl ... ..tar.md5;
- for AP - AP ... .tar.md5;
- for CP - CP ... .tar.md5;
- for CSC - CSC ... .tar.md5.
On the left side of the screen there are checkboxes with the name AUTO reboot and F.Reset Time. By default, they are installed, but it is better to make sure that the corresponding options are included.
All, the program is configured. Now you need to prepare a smartphone and connect it to a computer. To do this, first need to translate the phone to the firmware mode. On samsung, this is done by simultaneously pressing and holding at once the three keys: "Nutrition", "home" and "volume decrease". You need to keep the buttons until a yellow triangle appears on the display. When it is displayed - let go of the three previously clamped keys and click on the "Volume".
The phone is ready and it remains to be connected to a computer via a USB cable. It may take some time before the PC detects the device. When this happens, "COM" in the upper left corner will appear in blue. Everything can be pressed on Start, after which the firmware process will begin. Upon completion of the reinstallation of the system, the phone will restart (if the AUTO Reboot option was selected), and FINISH appears in the program-firmware.
How to flash samsung galaxy s3
Despite the fact that Samsung Galaxy S3 is already a very old device, it still uses some popularity. S3 is a kind of iPhone 5 in the world of samsung. It is not surprising, because these devices came out almost at the same time. Since this smartphone is quite old, the order of firmware of this android will be somewhat different.
For firmware, you will need a program called Multiloader (download), firmware and USB driver. Before reinstalling the system using the specified software, you need to make sure that there are no other Samsung applications on the computer. If they are present, they need to be uninstalled.
When Multiloader is unpacked, and the USB driver is installed, you will need to run specified Program. It is necessary to select BRCM2133, and then set the checkboxes in the following checkboxes: RSRC1, Factory FS and Full Download, and then specify the path to the firmware files: for boot - specify the bootfiles directory, which is located in the folder where the firmware has been unpacked, and For AMSS - file called apps_compresset.bin.
 Photo: We flash android samsung
 Now that the program is configured, you must prepare the phone itself. To do this, it is necessary to hold the keys at the same time: "Nutrition", "Home" and "Volume Reduction". After about 3 seconds, the inscription will appear on the screen, meaning that the phone is ready for receiving files, and, therefore, it can be connected to a USB PC.
 Photo: We flash samsung galaxy s3
 If before that everything was done correctly, then a few seconds after connecting the phone in Multiloader, the inscription COM15 READY SAMSUNG GALAXY S3 will appear. Now you only need to click on the download and wait for the end of the process, which takes about 2-3 minutes. When it is completed, you will need to turn off the USB and turn on the phone.
As you can see, the answers to how to flash android Samsung, quite simple. But despite this, in the absence of experience, it is still easy to make a mistake. In order not to turn the phone into the "brick", it is better to make a backup copy of the smartphone, from which it will be possible to recover if in the process of reinstalling the system there will be trouble.
Dear readers! If you have any questions or there are comments on the topic of the article - please leave them below.